For a few weeks there was a conversation going on in my head. Slowly the idea of "Why not just make my own almond milk?" started to creep in. "Why take the time? I can just buy it." Amazon is great for bulk order and my apt. runs on amazon.com orders. Why make anything? Because I like food. I like my food to taste good and every blogger I read was raving about making their own nut milk. There are times when I can be very lazy about making my food. Maybe this was something worth the 15 minutes from my week.
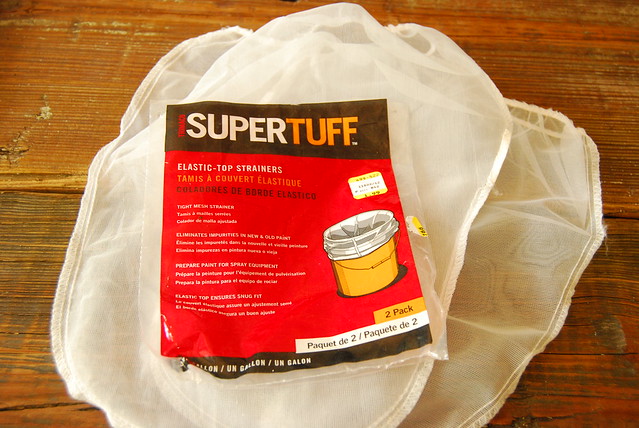
To make almond milk you will need a nut milk bag. Cost is around $7.00 on amazon (For a tiny little bag? WTF? They probably coast $0.25 to make) or a paint strainer bag. Cost is $2 for two bags and it's rounded at the bottom for easier straining. Bags that are square make it harder to control the flow of water. Paint strainer bags are the same thing as nut milk bags. They just don't come with a pretty green label to tell you its associated with health food. Can be purchased at any hardware store. Even in Jersey City!
 I
never knew it was this easy to make almond milk at home. It tastes so
much better then the store bought almond milk. It tastes like almonds.
I know, what a surprise. I guess I was surprised how much it tasted like almonds compared to the normal brand of Almond Breeze.
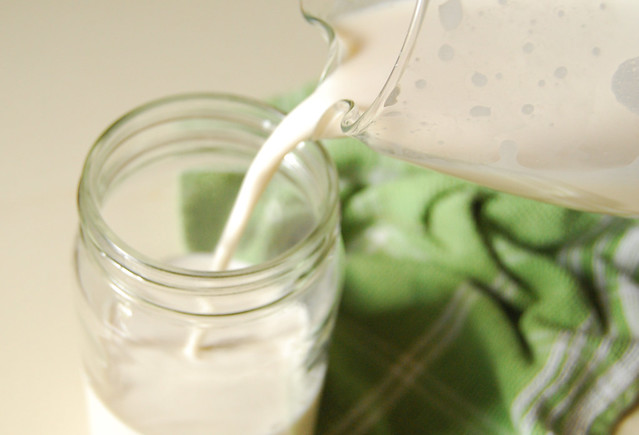
I
never knew it was this easy to make almond milk at home. It tastes so
much better then the store bought almond milk. It tastes like almonds.
I know, what a surprise. I guess I was surprised how much it tasted like almonds compared to the normal brand of Almond Breeze.
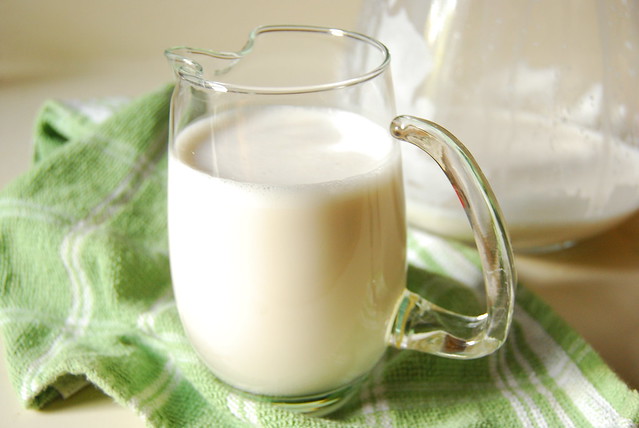
I did a taste test with my boyfriend this morning. I handed him two shot glasses. One with my almond milk and the other with Almond Breeze milk. "This one is obviously yours." It only took one sip. The second sip was Almond Breeze. Not much to say about that. The homemade was creamier and more nutty. Store bought didn't taste nutty in comparison. It also had mineral like after taste.
Expect the home made almond milk to separate when left sitting. The store brands use a binder to keep such as carrageenan (seaweed derived). Separation is natural. Give it a shake before pouring in your cereal.
There are lots of great recipes for almond milk. The one listed below is
the one I used. I would love to try and put in dates next time (like in
the video) and more vanilla. The variations are endless and really up to the individual. Now all I really need is a bunch of almonds and a nice glass pitcher. For now I stored it in two glass jars. I would also like to try and make rice milk or a mix of cashew & almond.
NOTES:
- Make sure to buy a bag with finished seams. I've read complaints that nut mill gets stuck in the seam.
- Turn bag inside out. So that the seam is facing out and not touching the pulp. This makes it easier to clean the bag.
- I don't use the same water as my soaking water and give it a quick rinse, just in case the almonds were dirty or any sink falls off.
- Less water makes it a creamier milk.
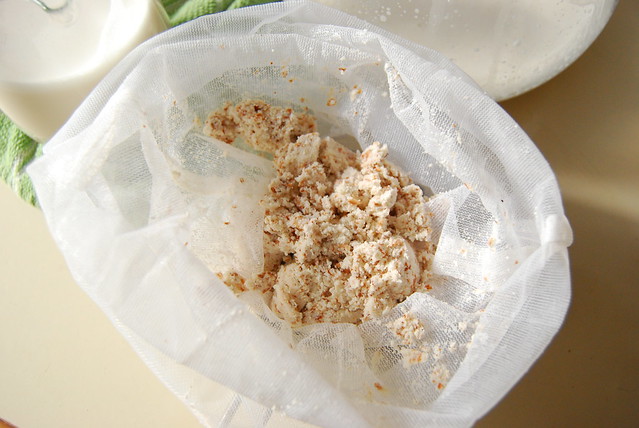
- Dehydrate the leftover pulp to make almond mill or make raw cookies like this lovely lady. (I no longer buy cookbooks but her uncookbook has such great energy behind it. I might break my rule.)
ALMOND MILK
( needs a blender)
( needs a blender)
1 cup almonds soaked overnight or at least 8 hrs.
3 cups water or more.
1 TBS sweetener or more to taste: agave, maple syrup, dates (I used maple syrup)
1 tsp vanilla or to taste
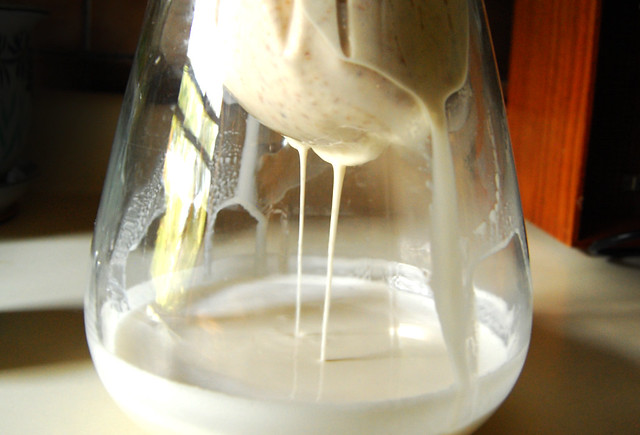
Place almonds, sweetener, vanilla and water in blender. Blend 2-5 min until almonds are incorporated into milk (this depends on blender). Place nut milk bag over bowl or pitcher and poor in almond and water mixture. Either you can hang bag over the bowl or pitcher and let it drain or you can slowly massage the bag to release the liquid. Store in refrigerator.
Will keep fresh for 4 - 6 days.
Will keep fresh for 4 - 6 days.